Blog

April 30, 2023
There’s a lot of debate as to whether or not you NEED to have a blog to see success on Pinterest. This is mostly because it hasn’t ALWAYS been this way. However, recently Pinterest took the ability to claim pretty much every platform away, so now your only really option is to claim your website. That means you can’t really get away with sharing Instagram content, Etsy product listings, YouTube videos, etc with your viewers anymore because you can’t claim those accounts anymore & in order to track your analytics, you have to have your content linking back to your “claimed account.” Which is now JUST your website.
This mainly poses a problem because Pinterest REALLY encourages fresh content. And part of fresh content is having fresh links to use on a monthly basis. So unless you have a storefront that is regularly updated or a blog that you frequently post to, it’s pretty difficult to give Pinterest what it wants — fresh content & fresh links.
So to be honest, Blogs are KINDA necessary for Pinterest Success
If you want to be able to track your progress on Pinterest or use the analytics tab at all, you really need to be sharing mainly content from your claimed website. (Side note: you ARE able to claim more than one website or URL).
Most people don’t have more than 5 or 6 pages on their site, so unless you have a blog or an online store, you’re going to run out of fresh links REALLY fast. I’m talking like…you might be able to get away with pinning to those 5 or 6 main urls for about a month before you get caught in the spam filter.
SO, the perfect solution for an online service provider, someone who wants to promote affiliate links, or any other online business owner that doesn’t actually have a STORE with a multitude of listed produtcts for sale (with individual product pages), a blog is a great way to create a plethora of fresh links on your website without having to reinvent the wheel.
Who DOESN’T Need a Blog
There are a few types of businesses I can think of that could probably get by on Pinterest without a blog. I’ve listed a few below along with reasons why they may not need a blog.
Online Retailers with Multiple Product Listings
Online retailers with multiple product listings already have a ton of indiVidual pages on their website for each product listing. That means they don’t REALLY need a blog in order to generate fresh links on a regular basis for Pinterest success. Another thing about online retailers is that they can (and should) become verified merchants on Pinterest, which means they’re able to import their full product catalogue, thereby creating evergreen stoppable pins with all product listings imported.
Artists, Wedding Photographers, or Anyone Else With Several Galleries or Portfolio Pages
Artists, wedding photographers, and other business owners with several gallery or portfolio links on their website that are frequently added to or updated can also get away with not having a blog. The reason that this works is that these galleries and portfolios function the same way as blogs, providing the business owner with several different URLs to alternate between when pinning.
I hope this helps! Learn more about what “fresh” URLs are and why you need them on this blog post!
Need help managing your Pinterest account or writing blogs? Click here to fill out a client application!
April 23, 2023
Pinterest Business accounts are a totally different beast to conquer if you’re used to using a personal Pinterest account! Using a personal account, it’s all about what appeals to you. Repin things you like, make boards that inspire you, throw the rest to the wind! But with Pinterest Business accounts, there’s a LOT more that you need to worry about. But it doesn’t have to be super intimidating! You can optimize your Pinterest account in no time & start making $$ & driving traffic to your site asap with the optimization tips I’ve laid out for you below.
Let’s dive in!
Create A Pinterest Business Profile
First and foremost, you’re going to want to log out of your personal account & create a NEW Pinterest Business account. Emphasis on BUSINESS! The business accounts give you more tools to ensure your businesses success on platform.
Do Keyword Research
Next you’re going to do your keyword research. This is an integral first step before you do any more optimization because you will use this research to help write your title, bio, board descriptions, and board titles. To do keyword research on Pinterest, start with a blank Google doc or Google sheet and answer the following questions: What products or services am I selling or trying to drive traffic to? Who is my ideal audience or ideal client? What questions are my ideal client asking me frequently? What are topics that I commonly cover when creating content?
Use the answers to these questions to get started. Open up Pinterest, head to the search bar at the top of your screen, and start typing relevant topics or phrases into the search bar. Write down the results — what auto populates after you you type your phrase? These are commonly searched for keywords and phrases that you can use to optimize your profile.
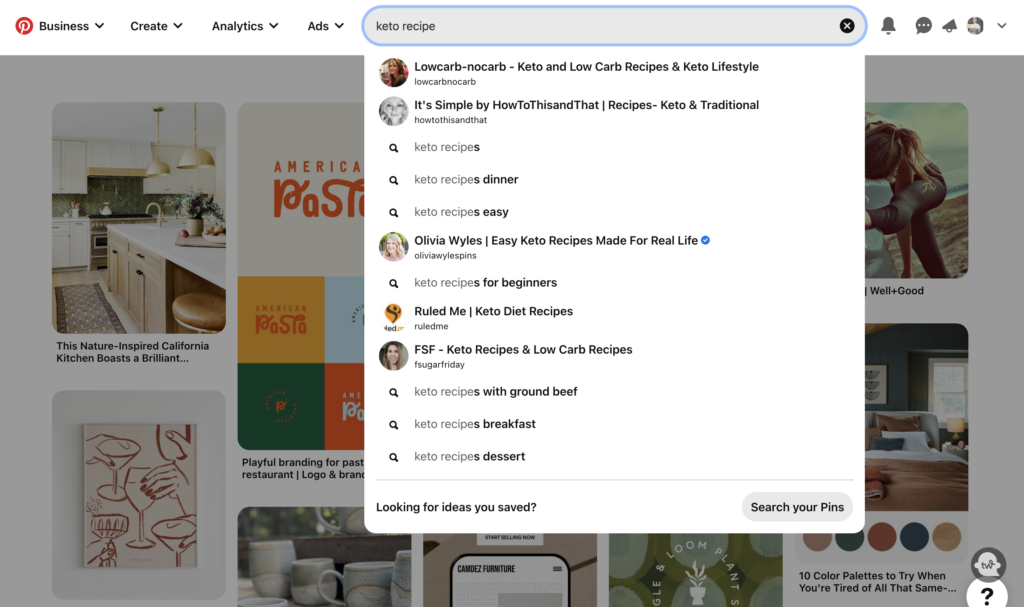
Keep track of all of your answers in a spreadsheet or google doc. You can also go to competitors pages for ideas. What keywords are they using in pin descriptions, titles, and graphics? What are their boards titled?
There is not solid “stopping” point for keyword research. Stop when you feel like you’re tired of looking. Your keyword research is something you will continuously be adding to, so just get enough done on the front end to feel confident moving forward into profile optimization and content creation. You can always add on later!
Optimize Your Pinterest Title & Bio
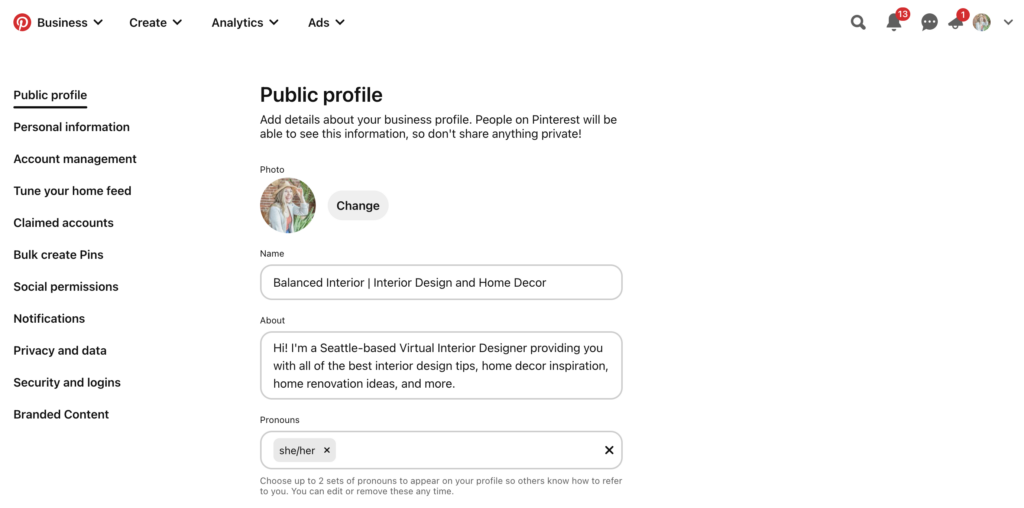
Now that you have your keyword research done, it’s time to start filling in the blanks. Go back to your settings & use your keywords to write your profile title and bio. I recommend your name or business name + a “title” that is commonly searched for. For example, “Grace John Creative | Digital Marketing Tips” or something along those lines.
For your bio, optimize it the same way you would your instagram bio. Describe what you do as concisely and with as many keywords as possible — without keyword stuffing!
Optimize your Pinterest Boards & Board Descriptions
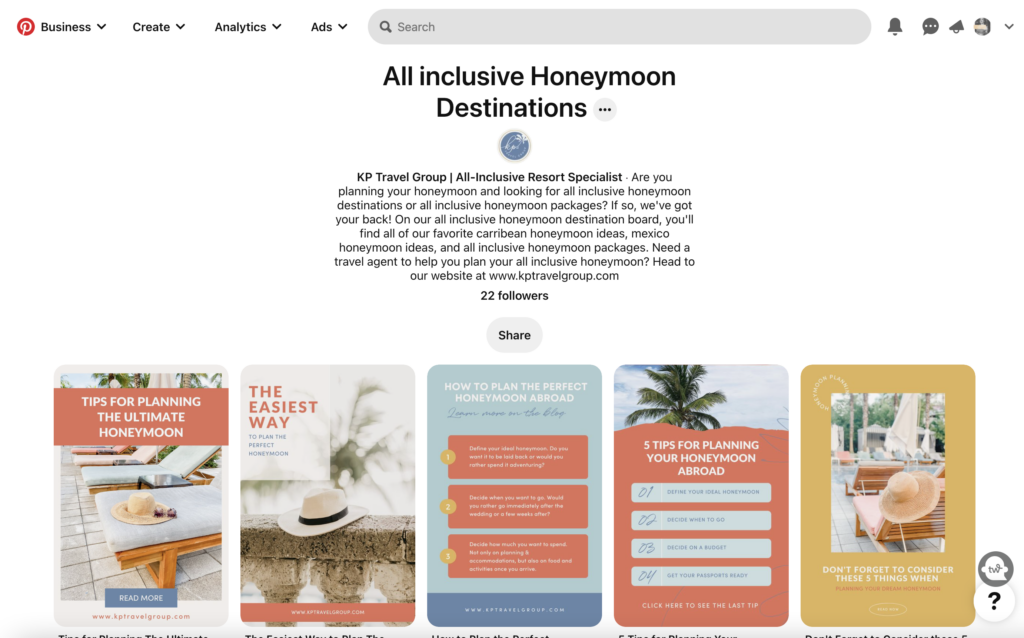
Next we move on to creating your boards and writing your board descriptions. Create 5 – 10 boards to start out with & make sure that the titles are relevant keywords that encompass a content pillar that you’ll be sharing about a lot. When you create the boards, immediately make them secret, then pin the top 30 recommended pins that populate to that board. This will help Pinterest know what type of content is going to be shared on that board which will better help index posts under the most relevant keyword once you start sharing content to that board.
Once you have all boards created and pinned to, start writing pin descriptions for them. Your pin description should be ~450 characters long & should use keywords relevant to that board. Make it conversational! Then, you’ll gradually make each board public again. I would say make 3 public per day. You don’t want to do everything all at once or you could get caught in the spam filter. Better to be safe than sorry!
Claim Your Website
Last but not least, you’re going to claim your website! This is the final & most important step of profile optimization because it allows you to track impressions, saves, and outbound clicks through your analytics tab. Claiming your website is different for every website builder, so I won’t go into too much detail here, but I will provide links to a few tutorials below!
To claim your website, go to settings > claimed > claim website > copy the HTML tag > enter your website URL > go to your website builder > insert code into site header > publish your changes > go back to Pinterest & click verify > you should be all set!
Claiming a Showit website on Pinterest
Claiming a Squarespace website on Pinterest
Claiming a WordPress website on Pinterest
Claiming a Shopify Website on Pinterest
Claiming a Wix Website on Pinterest
The Frills
If you want to go the extra mile, you can also create board covers and a Pinterest header image for your profile. These steps aren’t super necessary, they just make your account look that much more put together!
Next it’s allllll about creating & optimizing content, but I’ll cover that in another blog another day!
I hope this was super helpful! If you need more help, you can download my Pinterest Starter Bundle here or hire me as your Pinterest account manager here!
Talk to you soon!
Grace

April 15, 2023
If you’re anything like me, you spend a LOT of time on Pinterest. I mean, who can resist the endless scrolling and beautiful visuals? As a Pinterest Manager with a Graphic Design background, I know firsthand how important it is to have visually appealing graphics when it comes to promoting your business on Pinterest. And let me tell you, using pin templates is a game-changer (for both business owners & other Pinterest managers working with client accounts)!
Before I dive into how I save time & make more money by using pin templates, let’s chat about a few of their benefits:
Benefits of Pin Templates
First off, let’s get one thing straight: Literally NO ONE has time to be designing pins from scratch. As a busy entrepreneur, your time is precious, and you need to make every minute count. That’s where templates come in. They provide a starting point for your designs, so you don’t have to waste time reinventing the wheel. With templates, you can make a copy, change the colors, fonts, and images to colors, fonts, and images relevant to you (or your client’s) brand, update the copy, and you’re good to GO. No more spending 2 hours staring at all the Canva elements trying to figure out how you can make that butterfly graphic fit into your design without making the copy hard to read.
Templates aren’t JUST a time-saver either – there are so many other ways that they’ll make your life 10x easier. For starters, they ensure that your pins have a consistent look and feel, which is essential for building a strong brand identity on Pinterest. With templates, you can easily maintain a cohesive aesthetic across all of your pins, which helps your audience recognize and remember your brand.
Plus, let’s be real – not all of us are graphic designers. And that’s okay! Templates provide a starting point that can help even the most design-challenged among us create beautiful pins. Whether you’re looking for a bold and bright design or a minimalist aesthetic, there’s a template out there for you.
Alright, NOW let’s dive into how using pin templates has enabled me to work with more clients and make more money. It all comes down to my process.
How Templates Changed My Process
Before I started using pin templates, I was all over the place every time I needed to batch content for a client. My Canva wasn’t organized into projects, I didn’t have all of my clients brands set up in my account, I didn’t have a templates folder, and every time I had to create graphics I was spending hours either scrolling through Canva’s templates OR trying to create something from scratch.
Because I was spending SO much time on Graphics, I couldn’t afford to onboard more clients. I was already swamped with the 5 – 6 that I had. BUT when I implemented templates I was able to literally double the amount of clients I’m able to work with (also thanks to Chat GPT, but I’ll save that for another post). Here’s how I save time with templates:
- I couldn’t find a set that met ALL of my clients needs because I work with a slew of different types of businesses from online service providers to online stores and bloggers. SO I created my own set of 45 or so (you can buy them here) that work for ALL of my clients.
- Then, for all existing clients, I added their branding as brand kits into Canva.
- Then I created folders for all clients so that everything would live in the same place.
- Next I duplicated my templates into each client’s folder & rebranded them to match my client’s brand kits.
- NOW every month when I need to create pins for clients, I create a new doc within their folder, open up my branded templates for them in another tab, and copy and paste designs over based on the content I’ll be sharing that month.
- Last step? All I have to do is swap the copy, change up the images, and occasionally switch up the colors of the templates, which saves me about 1.5 hours per client. I went from spending 2 hours creating a month’s worth of graphics per client to 30 mins (MAX) creating graphics for clients (per month).
So there you have it! That’s how templates have enabled me to bring in more clients, more money, and save a ton of time in my Pinterest management business! I also recommend using templates for Instagram & blog headers. Anything that requires monthly graphics, really!
Don’t just take my word for it. Give Pinterest templates a try and see for yourself how much easier they can make your life. Whether you’re designing pins for yourself or for clients, templates are a must-have tool for any savvy pinner. If you’re looking for a set of tried and true pin templates approved by Pinterest managers all around, grab my set here!
Until next time!
Grace

August 6, 2022
Want to Steal My Pinterest Marketing Strategy?
Are you ready to finally see growth on your client’s Pinterest? Tired of trying something new every month, only to have the same results every time? I get it. Seeing those analytics flat-line, or even dip, is super discouraging. I’ve spent the last year refining my Pinterest strategy. With each of my clients, I learned something new and implemented it. I’ve taken numerous courses, and spent hours reading through blogs and posts about Pinterest strategy. I’ve finally gotten to a place where I am super confident with my strategy, and now I want to share it with you! Grab a pen and paper or your Notes app, because you’re going to want to save this information!
1. Determine your Pinterest-Specific Marketing Goal
Are you selling services, products, wanting to expand your audience, or even looking to diversify your entire marketing strategy? No matter what your goal is, knowing how to leverage Pinterest trends and best practices (like staying out of the spam filter) will help you get the most out of your Pinterest strategy. Figuring out your goal will help you determine how often you need to be posting. While post times aren’t the only important aspect of your Pinterest strategy, they are super important to give you a framework to start. If you’re looking for quicker growth selling products online, you’ll want to post more fresh pins daily. If you’re ok with taking it slow at first and want to get yourself in front of fresh eyes on a new platform, posting less to start is fine. For most clients, I post at least 4 times per day!
2. Decide How your Content will Look
After you’ve determined your ultimate goal and how often you’ll be posting to Pinterest, it’s time to think about visuals. After all, Pinterest is THE visual search engine, so graphics are very important here! Start brainstorming about what you want your content to look like. Some questions you can ask yourself are: Do I have a brand guide? Do I want to use templates? Do I want to make my own templates or purchase them from someone else? I recommend using templates, whether you make them yourself or purchase them from somewhere, like Creative Market. When I work with a client, I create around 20 branded templates so I always have something to pull from!
3. Formatting Your Content for Pinterest
Pinterest offers several different format options. From Idea pins, to carousel, to static pins, and video pins. What type of format will you focus on? I recommend trying every format as you’re first getting started, to see what works best for your brand, your profile, and your audience. Over time, you’ll see what formats work best for your account! Usually, I post a combination of fresh static pins, video pins, and 1-2 idea pins each week.
4. Choose a Goal for Your Post
Alright, are you ready to begin posting? Before you publish any fresh pins, it’s important to consider what the goal of each post is. A blog post pin might be used to drive traffic to your website. On the other hand, a product pin may drive sales and a meme pin could be used to grow your community and attract more leads. Try to focus on balancing these different types of posts and goals every week.
5. Your Pinterest Content Pillars
At some point, I’m sure you’ve come across the term “content pillars” in relation to Instagram, but did you know that content pillars are relevant to Pinterest as well? I typically create at least three different content pillars per client, and use all of them weekly! Here’s a quick refresher, just in case you can’t remember what they are: You create content pillars based on different types of content (like what we talked about in number 4). For example, one pillar could be a product feature, one may be a blog feature, one may be an infographic, and one may be educational, a tip, or DIY. It totally depends on what you’re selling (back in number 1)!
Need Some Extra Help?
If you’re starting to get an understanding for Pinterest, and the incredible growth you can experience within your business after implementing a Pinterest strategy, you can hire me as your Pinterest manager here! Or, if you’re looking for one-time assistance with set-up and getting your Pinterest Business account started, I also offer Done in a Day Pinterest Strategy Sessions here!